Chapter 42 - cx_Freeze
In this chapter, we will be learning about cx_Freeze, a cross-platform set of scripts designed to freeze Python scripts into executables in a manner similar to py2exe, PyInstaller, etc. We will freeze one console script and one window (i.e GUI) script, using the examples from the previous chapter. The cx_Freeze tool is the only binary creation tool that can work with both Python 2.x and 3.x on multiple operating systems at this time. We will be using it with Python 2.7 in this chapter only because we want to compare it directly to the other binary creation tools.
You can install cx_Freeze using one of their Windows installers, via their provided Linux RPMs, via a source RPM or directly from source. You can also use pip to install cx_Freeze.
Note: I tested on Windows 7 using Python 2.7.3, wxPython 2.9.4.0 (classic) and cx_Freeze 4.3.2.
Getting Started with cx_Freeze
As mentioned on the cx_Freeze website, there are three ways to use this script. The first is to just use the included cxfreeze script; the second is to create a distutils setup script (think py2exe) which you can save for future use; and the third is to work with the internals of cxfreeze. We will focus on the first two ways of using cx_Freeze. We’ll begin with the console script:
# config_1.py
import configobj

def createConfig(configFile):
    """
    Create the configuration file
    """
    config = configobj.ConfigObj()
    inifile = configFile
    config.filename = inifile
    config['server'] = "http://www.google.com"
    config['username'] = "mike"
    config['password'] = "dingbat"
    config['update interval'] = 2
    config.write()

def getConfig(configFile):
    """
    Open the config file and return a configobj
    """
    return configobj.ConfigObj(configFile)

def createConfig2(path):
    """
    Create a config file
    """
    config = configobj.ConfigObj()
    config.filename = path
    config["Sony"] = {}
    config["Sony"]["product"] = "Sony PS3"
    config["Sony"]["accessories"] = ['controller', 'eye', 'memory stick']
    config["Sony"]["retail price"] = "$400"
    config.write()

if __name__ == "__main__":
    createConfig2("sampleConfig2.ini")
All this script does is create a really simple configuration file using Michael Foord’s configobj module. You can set it up to read the config too, but for this example, we’ll skip that. Let’s find out how to build a binary with cx_Freeze! According to the documentation, all it should take is the following string on the command line (assuming you are in the correct directory):
cxfreeze config_1.py --target-dir dirName
This assumes that you have C:\PythonXX\Scripts on your path. If not, you’ll either have to fix that or type out the fully qualified path. Anyway, if the cxfreeze script runs correctly, you should have a folder with the following contents:
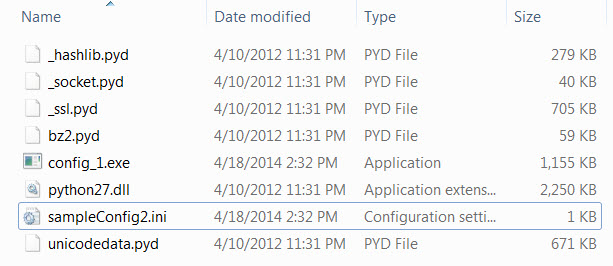
As you can see, the total file size should around 5 megabytes. That was pretty easy. It even picked up the configobj module without our having to tell it to. There are 18 command line arguments you can pass to cx_Freeze to control how it does things. These range from what modules to include or exclude, optimization, compression, include a zip file, path manipulation and more.
Now let’s try something a little more advanced.
Advanced cx_Freeze - Using a setup.py File
First off we need a script to use. We will use the wxPython form example from the previous chapters.
import wx

class DemoPanel(wx.Panel):
    """"""

    def __init__(self, parent):
        """Constructor"""
        wx.Panel.__init__(self, parent)

        labels = ["Name", "Address", "City", "State", "Zip",
                  "Phone", "Email", "Notes"]

        mainSizer = wx.BoxSizer(wx.VERTICAL)
        lbl = wx.StaticText(self, label="Please enter your information here:")
        lbl.SetFont(wx.Font(12, wx.SWISS, wx.NORMAL, wx.BOLD))
        mainSizer.Add(lbl, 0, wx.ALL, 5)
        for lbl in labels:
            sizer = self.buildControls(lbl)
            mainSizer.Add(sizer, 1, wx.EXPAND)
        self.SetSizer(mainSizer)
        mainSizer.Layout()

    def buildControls(self, label):
        """
        Put the widgets together
        """
        sizer = wx.BoxSizer(wx.HORIZONTAL)
        size = (80,40)
        font = wx.Font(12, wx.SWISS, wx.NORMAL, wx.BOLD)

        lbl = wx.StaticText(self, label=label, size=size)
        lbl.SetFont(font)
        sizer.Add(lbl, 0, wx.ALL|wx.CENTER, 5)
        if label != "Notes":
            txt = wx.TextCtrl(self, name=label)
        else:
            txt = wx.TextCtrl(self, style=wx.TE_MULTILINE, name=label)
        sizer.Add(txt, 1, wx.ALL, 5)
        return sizer

class DemoFrame(wx.Frame):
    """
    Frame that holds all other widgets
    """

    def __init__(self):
        """Constructor"""
        wx.Frame.__init__(self, None, wx.ID_ANY,
                          "Py2Exe Tutorial",
                          size=(600,400)
                          )
        panel = DemoPanel(self)
        self.Show()

if __name__ == "__main__":
    app = wx.App(False)
    frame = DemoFrame()
    app.MainLoop()
Now let’s create a setup.py file in the cx_Freeze style:
# setup.py
from cx_Freeze import setup, Executable

setup(
    name = "wxSampleApp",
    version = "0.1",
    description = "An example wxPython script",
    executables = [Executable("sampleApp.py")]
    )
As you can see, this is a pretty simple one. We import a couple classes from cx_Freeze and pass some parameters into them. In this case, we give the setup class a name, version, description and Executable class. The Executable class also gets one parameter, the script name that it will use to create the binary from.
Alternatively, you can create a simple setup.py using cx_Freeze’s quickstart command (assuming it’s on your system’s path) in the same folder as your code:
cxfreeze-quickstartTo get the setup.py to build the binary, you need to do the following on the command line:
python setup.py build
After running this, you should end up with the following folders: buildexe.win32-2.7. Inside that last folder I ended up with 15 files that total 16.6 MB. When you run the sampleApp.exe file, you will notice that we’ve screwed something up. There’s a console window loading in addition to our GUI! To rectify this, we’ll need to change our setup file slightly. Take a look at our new one:
from cx_Freeze import setup, Executable

exe = Executable(
    script="sampleApp.py",
    base="Win32GUI",
    )

setup(
    name = "wxSampleApp",
    version = "0.1",
    description = "An example wxPython script",
    executables = [exe]
    )
First off, we separated the Executable class from the setup class and assigned the Executable class to a variable. We also added a second parameter to the Executable class that is key. That parameter is called base. By setting base=”Win32GUI”, we are able to suppress the console window. The documentation on the cx_Freeze website shows the many other options that the Executable class takes.
Wrapping Up
Now you should know how to create binaries with cx_Freeze. It’s pretty easy to do and it ran a lot faster than bbfreeze did in my testing. If you have the need to create binaries for both Python 2.x and 3.x on all major platforms, then this is the tool for you!