Chapter 43 - PyInstaller
PyInstaller is the last tool we will be looking at for creating binaries. It supports Python 2.4 - 2.7. We will continue to use our simple console and wxPython GUI scripts for our testing. PyInstaller is supposed to work on Windows, Linux, Mac, Solaris and AIX. The support for Solaris and AIX is experimental. PyInstaller supports code-signing (Windows), eggs, hidden imports, single executable, single directory, and lots more!
Note: I tested on Windows 7 using Python 2.7.3, wxPython 2.9.4.0 (classic) and PyInstaller 2.1.
Getting Started with PyInstaller
To install PyInstaller, you can download the source code in a tarball or zip archive, decompress it and run its setup.py file:
python setup.py install
You can also install PyInstaller using pip. We will start with our little piece of config creation code:
# config_1.py
import configobj

def createConfig(configFile):
    """
    Create the configuration file
    """
    config = configobj.ConfigObj()
    inifile = configFile
    config.filename = inifile
    config['server'] = "http://www.google.com"
    config['username'] = "mike"
    config['password'] = "dingbat"
    config['update interval'] = 2
    config.write()

def getConfig(configFile):
    """
    Open the config file and return a configobj
    """
    return configobj.ConfigObj(configFile)

def createConfig2(path):
    """
    Create a config file
    """
    config = configobj.ConfigObj()
    config.filename = path
    config["Sony"] = {}
    config["Sony"]["product"] = "Sony PS3"
    config["Sony"]["accessories"] = ['controller', 'eye', 'memory stick']
    config["Sony"]["retail price"] = "$400"
    config.write()

if __name__ == "__main__":
    createConfig2("sampleConfig2.ini")
Now let’s try to create an executable! You should be able to just do this to get PyInstaller to work:
pyinstaller config_1.py
When I ran this, I got the following error:
Error: PyInstaller for Python 2.6+ on Windows needs pywin32.
Please install from http://sourceforge.net/projects/pywin32/
To use PyInstaller on Windows, you will need to install PyWin32 first! Once you have PyWin32 installed, try re-running that command. You should see a lot of output sent to the screen and you should also see these two folders appear next to your script: build and dist. If you go into the dist folder, and then into its config_1 folder, you should see something like this:
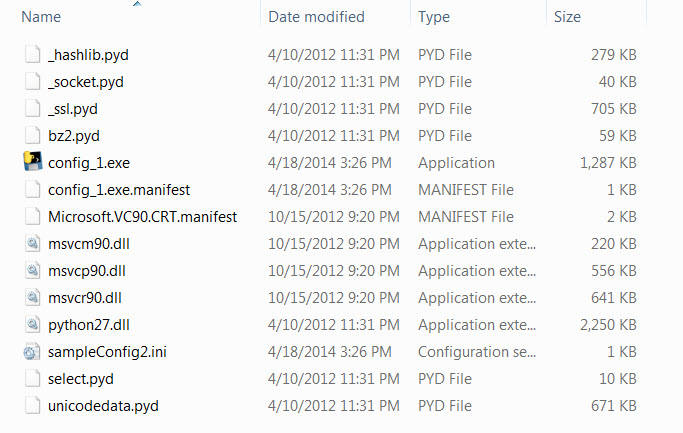
When I ran the executable, it created the config file just as it should. You will notice that PyInstaller was able to grab configobj without you needing to tell it to.
PyInstaller and wxPython
Now let’s try creating a binary from a simple wxPython script. Here’s the wxPython code that we’ve been using in previous chapters:
import wx

class DemoPanel(wx.Panel):
    """"""

    def __init__(self, parent):
        """Constructor"""
        wx.Panel.__init__(self, parent)

        labels = ["Name", "Address", "City", "State", "Zip",
                  "Phone", "Email", "Notes"]

        mainSizer = wx.BoxSizer(wx.VERTICAL)
        lbl = wx.StaticText(self, label="Please enter your information here:")
        lbl.SetFont(wx.Font(12, wx.SWISS, wx.NORMAL, wx.BOLD))
        mainSizer.Add(lbl, 0, wx.ALL, 5)
        for lbl in labels:
            sizer = self.buildControls(lbl)
            mainSizer.Add(sizer, 1, wx.EXPAND)
        self.SetSizer(mainSizer)
        mainSizer.Layout()

    def buildControls(self, label):
        """
        Put the widgets together
        """
        sizer = wx.BoxSizer(wx.HORIZONTAL)
        size = (80,40)
        font = wx.Font(12, wx.SWISS, wx.NORMAL, wx.BOLD)

        lbl = wx.StaticText(self, label=label, size=size)
        lbl.SetFont(font)
        sizer.Add(lbl, 0, wx.ALL|wx.CENTER, 5)
        if label != "Notes":
            txt = wx.TextCtrl(self, name=label)
        else:
            txt = wx.TextCtrl(self, style=wx.TE_MULTILINE, name=label)
        sizer.Add(txt, 1, wx.ALL, 5)
        return sizer

class DemoFrame(wx.Frame):
    """
    Frame that holds all other widgets
    """

    def __init__(self):
        """Constructor"""
        wx.Frame.__init__(self, None, wx.ID_ANY,
                          "Py2Exe Tutorial",
                          size=(600,400)
                          )
        panel = DemoPanel(self)
        self.Show()

if __name__ == "__main__":
    app = wx.App(False)
    frame = DemoFrame()
    app.MainLoop()
If you execute the pyinstaller command against this script, you will see ever more output sent to the screen. It will create 23 files that total 19.4 MB. You will also notice that when you run the sampleApp.exe, it shows a console window in addition to your GUI, which is not what we want. The simplest way to fix that is to call PyInstaller with the -w command which tells PyInstaller to suppress the console window:
pyinstaller -w sampleApp.py
The PyInstaller package has many command line options that you can use to change the way PyInstaller processes your program. Whenever you run PyInstaller, it will create a spec file that it uses to process your program. If you’d like to save a copy of the spec file to help you better understand what PyInstaller is doing, you can do so using the following command:
pyi-makespec sampleApp.py
You can pass the same commands to pyi-makespec as you do to PyInstaller, which will change the spec appropriately. Here’s the contents of the spec that was created with the previous command:
# -*- mode: python -*-
a = Analysis(['sampleApp.py'],
             pathex=['c:\\py101\\wxpy'],
             hiddenimports=[],
             hookspath=None,
             runtime_hooks=None)
pyz = PYZ(a.pure)
exe = EXE(pyz,
          a.scripts,
          exclude_binaries=True,
          name='sampleApp.exe',
          debug=False,
          strip=None,
          upx=True,
          console=False )
coll = COLLECT(exe,
               a.binaries,
               a.zipfiles,
               a.datas,
               strip=None,
               upx=True,
               name='sampleApp')
In earlier versions of PyInstaller, you would actually create the spec file and edit it directly. Now unless you need something really special, you can generate the right spec by just using flags. Be sure to read the documentation for full details as there are many flags and describing them all is outside the scope of this chapter.
Wrapping Up
This ends our quick tour of PyInstaller. I hope you found this helpful in your Python binary-making endeavors. The PyInstaller project is pretty well documented and worth your time to check out.