Chapter 44 - Creating an Installer
In this chapter, we will walk you through the process of creating an executable and then packaging it up into an installer. We will be using a really neat little user interface called GUI2Exe that was written by Andrea Gavana to create the executable. It is based on wxPython, so you will need to have that installed to use it. GUI2Exe supports py2exe, bbfreeze, cx_Freeze, PyInstaller and py2app. Then once we have the dist folder created, we will use Inno Setup to create our installer.
We will be using the following code once more:
# sampleApp.py

import wx

class DemoPanel(wx.Panel):
    """"""

    def __init__(self, parent):
        """Constructor"""
        wx.Panel.__init__(self, parent)

        labels = ["Name", "Address", "City", "State", "Zip",
                  "Phone", "Email", "Notes"]

        mainSizer = wx.BoxSizer(wx.VERTICAL)
        lbl = wx.StaticText(self, label="Please enter your information here:")
        lbl.SetFont(wx.Font(12, wx.SWISS, wx.NORMAL, wx.BOLD))
        mainSizer.Add(lbl, 0, wx.ALL, 5)
        for lbl in labels:
            sizer = self.buildControls(lbl)
            mainSizer.Add(sizer, 1, wx.EXPAND)
        self.SetSizer(mainSizer)
        mainSizer.Layout()

    def buildControls(self, label):
        """
        Put the widgets together
        """
        sizer = wx.BoxSizer(wx.HORIZONTAL)
        size = (80,40)
        font = wx.Font(12, wx.SWISS, wx.NORMAL, wx.BOLD)

        lbl = wx.StaticText(self, label=label, size=size)
        lbl.SetFont(font)
        sizer.Add(lbl, 0, wx.ALL|wx.CENTER, 5)
        if label != "Notes":
            txt = wx.TextCtrl(self, name=label)
        else:
            txt = wx.TextCtrl(self, style=wx.TE_MULTILINE, name=label)
        sizer.Add(txt, 1, wx.ALL, 5)
        return sizer

class DemoFrame(wx.Frame):
    """
    Frame that holds all other widgets
    """

    def __init__(self):
        """Constructor"""
        wx.Frame.__init__(self, None, wx.ID_ANY,
                          "Py2Exe Tutorial",
                          size=(600,400)
                          )
        panel = DemoPanel(self)
        self.Show()

if __name__ == "__main__":
    app = wx.App(False)
    frame = DemoFrame()
    app.MainLoop()
Let’s get started!
Getting Started with GUI2Exe
To use GUI2Exe, you just have to go to its website (http://code.google.com/p/gui2exe/) and download a release. Then you unzip it and run the script that’s called GUI2Exe.py. The GUI2Exe project is based on wxPython, so make sure you have that installed as well. I ran mine successfully with wxPython 2.9. Here’s how you would call it:
python GUI2Exe.py
If that executed successfully, you should see a screen similar to this one:
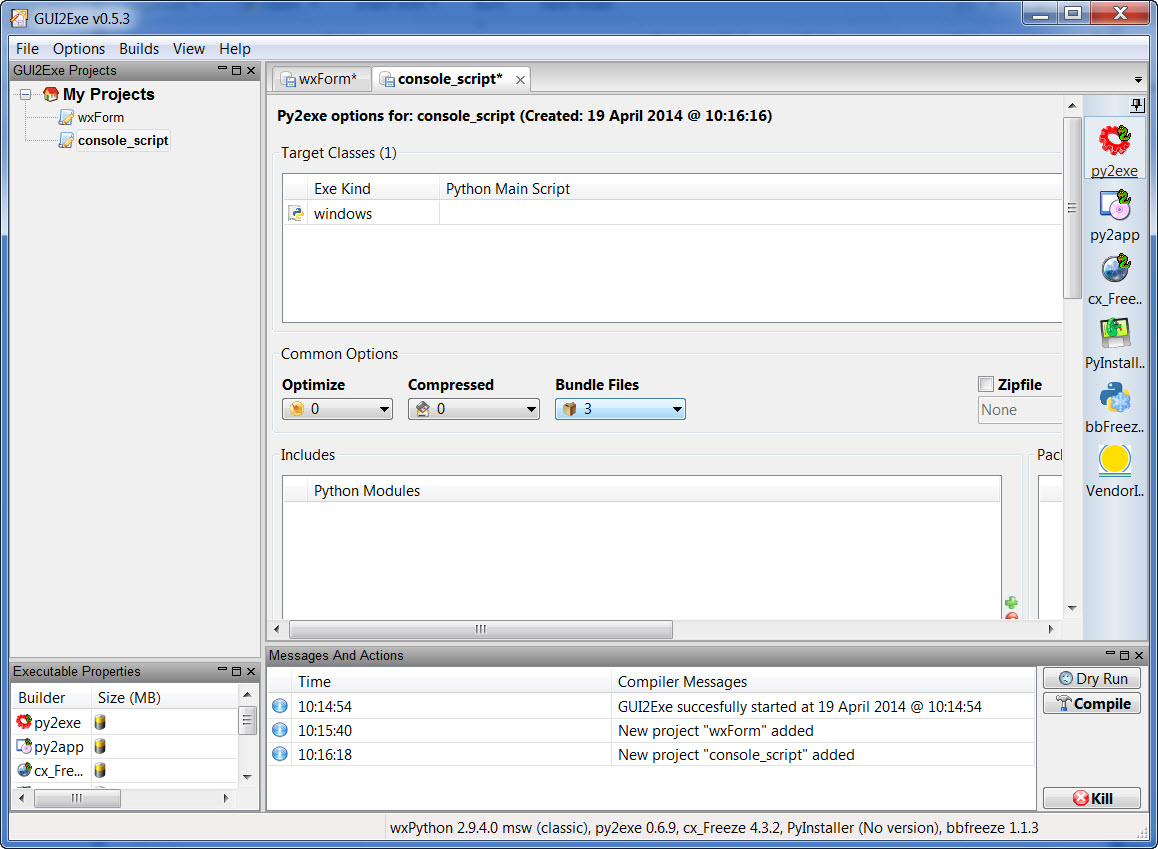
Now go to File -> New Project and give your project a name. In this case, I called the project wxForm. If you want to, you can add a fake Company Name, Copyright and give it a Program Name. Be sure to also browse for your main Python script (i.e. sampleApp.py). According to Andrea’s website, you should set Optimize to 2, Compressed to 2 and Bundled Files to 1. This seems to work most of the time, but I’ve had some screwy errors that seem to stem from setting the last one to 1. In fact, according to one of my contacts on the py2exe mailing list, the bundle option should be set to 3 to minimize errors. The nice thing about setting bundle to “1” is that you end up with just one file, but since I’m going to roll it up with Inno I’m going to go with option 3 to make sure my program works well.
Once you have everything the way you want it, click the Compile button in the lower right-hand corner. This will create all the files you want to distribute in the dist folder unless you have changed the name by checking the dist checkbox and editing the subsequent textbox. When it’s done compiling, GUI2Exe will ask you if you want to test your executable. Go ahead and hit Yes. If you receive any errors about missing modules, you can add them in the Python Modules or Python Packages section as appropriate. For this example, you shouldn’t have that issue though.
Now we’re ready to learn about creating the installer!
Let’s Make an Installer!
Now that we have an executable and a bunch of dependencies, how do we make an installer? For this chapter we’ll be using Inno Setup, but you could also use NSIS or a Microsoft branded installer. You will need to go to their website (http://www.jrsoftware.org/isdl.php), download the program and install it. Then run the program. You should see the main program along with the following dialog on top of it:
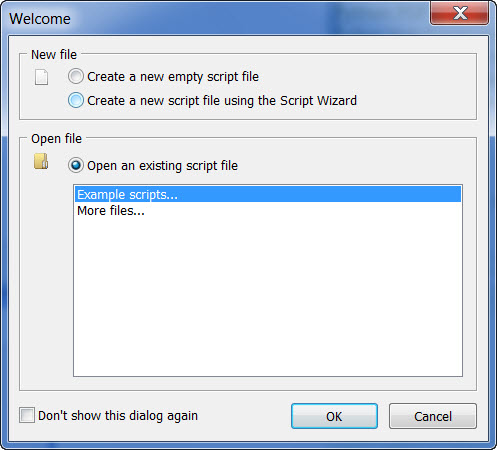
Choose the Create a new script using the Script Wizard option and then press the OK button. Click Next and you should see something like this:
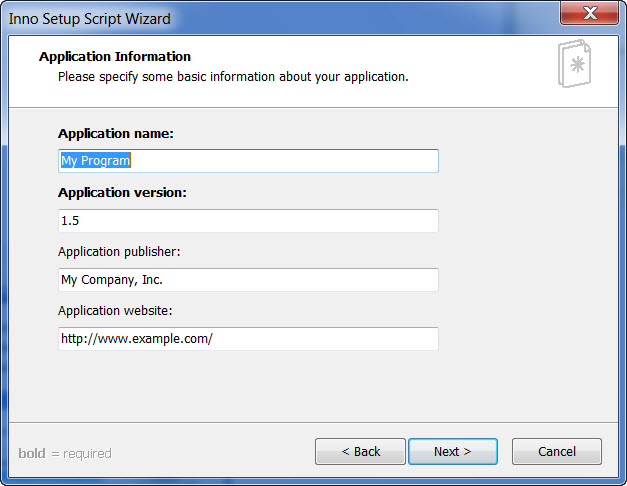
Fill this out however you like and click Next (I called mine wxForm). This next screen allows you to choose where you want the application to be installed by default. It defaults to Program Files which is fine. Click Next. Now you should see the following screen:
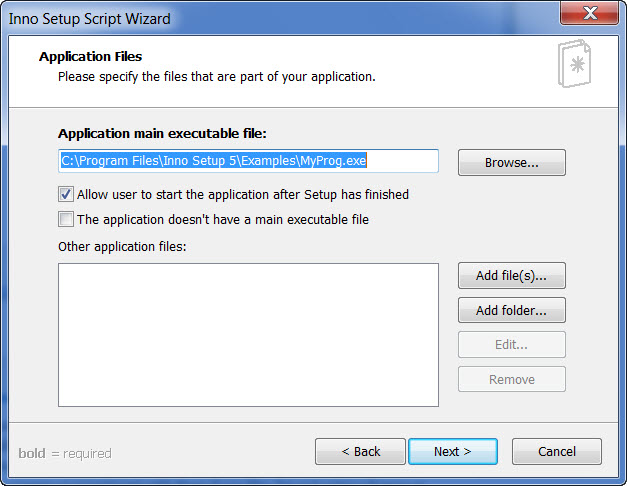
Browse to the executable you created to add it. Then click the Add file(s)... button to add the rest. You can actually select all of the files except for the exe and hit OK. This is how mine turned out:
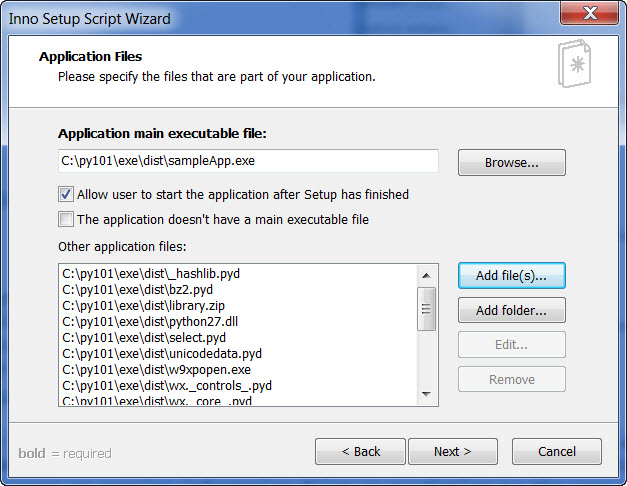
Now you’re ready to click Next. Make sure the Start Menu folder has the right name (in this case, wxForm) and continue. You can ignore the next two screens or experiment with them if you like. I’m not using a license or putting information files in to display to the user though. The last screen before finishing allows you to choose a directory to put the output into. I just left that empty since it defaults to where the executable is located, which is fine with this example. Click Next, Next and Finish. This will generate a full-fledged .iss file, which is what Inno Setup uses to turn your application into an installer. It will ask you if you’d like to go ahead and compile the script now. Go ahead and do that. Then it will ask if you’d like to save your .iss script. That’s a good idea, so go ahead and do that too. Hopefully you didn’t receive any errors and you can try out your new installer.
If you’re interested in learning about Inno’s scripting language, feel free to read Inno’s Documentation. You can do quite a bit with it. If you happen to make changes to your build script, you can rebuild your installer by going to the build menu and choosing the compile menu item.
Wrapping Up
At this point, you now know how to create a real, live installer that you can use to install your application and any files it needs to run. This is especially handy when you have a lot of custom icons for your toolbars or a default database, config file, etc that you need to distribute with your application. Go back and try creating the installer again, but choose different options to see what else you can do. Experimenting is a great way to learn. Just make sure you always have a backup in case something goes wrong!